LP12 Optimum Torque Settings
Moderator: Staff


LP12 Optimum Torque Settings
Deleted in deference to Thomas, Frederik and others.
Last edited by John on 2012-07-17 23:10, edited 5 times in total.

Re: LP12 Optimum Torque Settings
I've not checked them all, but the Akiva stood out, and a quick browse found this:
More importantly, and I'm sure you already know this John, but for the benefit of anyone else finding this thread, the torque figures should only be viewed as a starting off point. You still need to fine tune yourself by ear, using the torque driver and tune method.Fredrik wrote:I find that the Akiva should be tightened with a little less than 1 Nm to the headshell
I have a CAL 36/4 on the way along with 2, 3, 4mm Allen and 5.5 and 8mm deep sockets so will get to reset and check how much different my handset deck is from the above torque settings.
I have never used a torque tool before so I suppose there will be a learning curve to get familiar with how it works. I'm using a GS subchassis so will be dealing with a fitting that I'm sure is different from the arm collar to wooden armboard. I imagine it will be more similar to the torque setting of the bearing to keel.
I'm a bit surprised that the torque setting of the Klyde is so much less than that of the Akiva. I rotate between an Asaka, Klyde and currently use a Troika. It will be interesting to see where I'm at torque wise with how it's currently setup. It's definitely not gorilla tight and neither is the grub screw. Actually none of my fittings are, the tightest right now are the bearing and arm collar.
I'm hoping there is a way to check all my current torque settings on my deck before making any changes. I suppose I can start with a very low torque setting and then work my way up until it moves the nut. Hopefully that's fairly easy and straight forward to do.

Hi John!
Nice to hear you're getting a tool. In the values above, does (L) stand for Linn or Lejonklou? As Charlie pointed out, the tools vary a bit between each other, and that's why all values we share are approximate. But when using the same tool I find the optimal values stay exactly the same over time.
In my experience, it's impossible to figure out the torque a fastener was tightened with, when loosening it.
Looking forward to giving this a go. The (L) stands for settings I found that were attributed to Lejonklou, please forgive me if they were misquoted. Please correct them or update them if you find them incorrect.
I thought I read somewhere that you found used CAL 36/4 tools to be pretty consistent and were pretty much within spec. I'm hoping that's the case with the used one I purchased.
Regarding testing current torque settings, I'm hoping to start with a low torque setting, attempt to "tighten" the nut, if it doesn't, then incrementally increase the torque setting until it feels like I'm getting resistance or the nut starts to turn. That would then be my current hand torque setting. I'm hope that makes sense and is doable.
Yes, it's really low isn't it and I felt just on the cusp of gripping the cartridge enough to lock position (I could be wrong on that, but that was my perception.) For the most part, I used Thomas and Fredrik's settings and worked around those points. However, the Klyde being so different than Linn recommends, I did compare it to 1Nm, but in the end preferred 0.4Nm.John wrote:I'm a bit surprised that the torque setting of the Klyde is so much less than that of the Akiva. I rotate between an Asaka, Klyde and currently use a Troika. It will be interesting to see where I'm at torque wise with how it's currently setup.
Last edited by Charlie1 on 2012-07-08 17:34, edited 1 time in total.
Ok! You wrote (F) in the first post, however.John wrote:The (L) stands for settings I found that were attributed to Lejonklou
It won't work. I've tried various ways and it just doesn't seem possible to figure out what torque was previously used.John wrote:Regarding testing current torque settings, I'm hoping to start with a low torque setting, attempt to "tighten" the nut, if it doesn't, then incrementally increase the torque setting until it feels like I'm getting resistance or the nut starts to turn. That would then be my current hand torque setting. I'm hope that makes sense and is doable.
Well the Rega torque wrench is 0.4Nm so I imagine that's likely correct for something like a Klyde. Maybe I'm more surprised the Akiva is so much higher in torque. I suppose I'll have a better idea once I get the tool in my hand and experiment a bit with it myself.Charlie1 wrote:Yes, it's really low isn't it and I felt just on the cusp of gripping the cartridge enough. For the most part, I used Thomas and Fredrik's settings and worked around those points. However, the cartridge being so different than Linn recommends, I did compare it to 1Nm, but in the end preferred 0.4Nm.John wrote:I'm a bit surprised that the torque setting of the Klyde is so much less than that of the Akiva. I rotate between an Asaka, Klyde and currently use a Troika. It will be interesting to see where I'm at torque wise with how it's currently setup.
I think it's a good idea to use "new" cartridge hardware each time you install a new cartridge, especially if the hardware was once over-tightened to the point of stressing the threads.
Oops! Correction made to OP.lejonklou wrote:Ok! You wrote (F) in the first post, however.John wrote:The (L) stands for settings I found that were attributed to Lejonklou
John wrote:Regarding testing current torque settings, I'm hoping to start with a low torque setting, attempt to "tighten" the nut, if it doesn't, then incrementally increase the torque setting until it feels like I'm getting resistance or the nut starts to turn. That would then be my current hand torque setting. I'm hope that makes sense and is doable.
That's not good if that's the case. Why is that? Do you have to always start with a loose nut when using a torque screwdriver?lejonklou wrote: It won't work. I've tried various ways and it just doesn't seem possible to figure out what torque was previously used.
No, you can gradually tighten a nut, with higher and higher torque. I find that procedure to be exact and repeatable.John wrote:That's not good if that's the case. Why is that? Do you have to always start with a loose nut when using a torque screwdriver?
But when loosening, the torque required isn't always the same as the one you tightened it with. Try it and you will see what I mean.
My plan is to gradually "tighten", (not loosen), with increasing torque, the nuts as currently set on my deck until I get resistance or one the nut turns. When that occurs I will assume that is very close to the torque I used when I hand tightened the nut.lejonklou wrote:No, you can gradually tighten a nut, with higher and higher torque. I find that procedure to be exact and repeatable.John wrote:That's not good if that's the case. Why is that? Do you have to always start with a loose nut when using a torque screwdriver?
But when loosening, the torque required isn't always the same as the one you tightened it with. Try it and you will see what I mean.
I'm assuming the torque driver works in only one direction!
If you gradually tighten a nut, you will be able to hear the result of the tightening.
If the fastener was previously tightened with higher torque than the tool is set to, nothing happens. Once the tool has higher torque than the fastener, you will hear the difference.
You won't, however, be able to see or feel when the torque of the tool passes the torque that the fastener was previously tightened with.
Here is a link to the owner's manual.
http://www.srtorque.com/Downloads/Instr ... 57176B.pdf
So I will start with a low torque and gradually increase the torque until I hear an audible click. That will then be very close to my hand tightened torque. That should work I would think.
http://www.srtorque.com/Downloads/Instr ... 57176B.pdf
So I will start with a low torque and gradually increase the torque until I hear an audible click. That will then be very close to my hand tightened torque. That should work I would think.
You don't seem to understand how the tool works.
You will get a click every time the tool reaches its set torque.
Using a lower torque than the fastener was previously tightened to will yield a click. Increase the torque setting and you will still get a click. Eventually you will start tightening the fastener more than it already is, but you will not see or feel this. You can, however, hear the result of the increased torque on the fastener, provided you evaluate it by listening.
OK, I think I get it. There's no way you can use the tool to identify the current torque of a nut because it always clicks when the torque is exceeded and there is no way to tell if additional torque was applied by feel. Oh well scrap that idea.
I would assume you have written down the precise final torques of all the nuts on your LP12 then for future reference. How much do they vary from what I listed as starting points? Do you have a precise torque for the bearing to Keel? The 3-4Nm seems like a big range.
I would assume you have written down the precise final torques of all the nuts on your LP12 then for future reference. How much do they vary from what I listed as starting points? Do you have a precise torque for the bearing to Keel? The 3-4Nm seems like a big range.
Correct regarding the tool!
It was Thomas O'Keefe who started this torque tool thing. When he approached me with it, I had been toying with the idea for a couple of years but never gotten around to it. So I was excited. The results are fantastic, provided one can evaluate with the Tune Method in a consistent way. It's similar to positioninging loudspeakers in a room; being exact can significantly improve the performance of the system, but in order to succeed one has to be good at telling better from worse.
Thomas, Paolo and I have calibrated our tools against eachother's and we take notes and share the numbers on all fasteners we try. As mentioned before, there are often several peaks that sound good and one that's best. So occasionally we arrive at different numbers and then try eachother's values until we agree which is the best. The list of values is extensive, but Thomas is in charge of what we share with others outside the group.
I have found the optimal value for main bearing to Keel between 3.7 and 3.9 Nm. If you start at 3.7 and go up, I think you'll find the best peak in that range.
Thanks for the info. I look forward to getting the tool and making adjustments to the majority of my torque settings. I will likely start out with the recommendations of all the torques applicable to my deck and then live with them for awhile before tweaking on them unless they seem way off for my particular tool.
It will probably be a few weeks before I attempt any torque changes. I will have limited time the next few weeks and my Lingo will be getting recapped during that time and I don't want to make any changes to the turntable so I can make better judgements on what the recap did for the performance.
In the meantime I hope to obtain more info on the workings of the tool and try to learn from others on how they went about making adjustments and evaluations of the changes. For example, I would assume a baseline setup of the deck needs to be made using the suggested baseline torques. From there, I'm thinking there must be some hierarchy order of specific torque adjustments that make the most sense. ie, motor nuts, motor stud bolt, bearing, arm collar bolts, tonearm grub screw, cartridge bolts...
What you could do, with just a little extra work, is take one fixing, such as the arm height, and work out how close your driver is away from Fredrik/Thomas/Paulo. You could then apply the same offset, if any, to the remaining fixings without needing to spend a lot of time fine-tuning, by ear. This should not take you much more time that your existing plan of action.John wrote:I will likely start out with the recommendations of all the torques applicable to my deck and then live with them for awhile before tweaking on them unless they seem way off for my particular tool.
Bear in mind that the closer you get to an optimum setting, the more difference it seems to make, so that 'quite close' and 'way-out' might not sound that different. Where as, 'really close' and 'bang-on' can seem a bigger step. In other words, going all the way is well worth the additional effort as you get more out of it than you put in, if that makes sense. Similar to speaker positioning, in my experience, so the last few mm is when things can really come together.
I would caveat the above and say that my comments are all in the context of what I've heard is possible through optimising the torque. So, an un-optimised LP12 need not sound rubbish. After all, many of us were very happy with our LP12 long before this topic came to light. Just like optimising the fixings won't make it sound like you've just upgraded to a Radikal, provided the deck was well setup in the first place, of course.
Last edited by Charlie1 on 2012-07-09 19:55, edited 1 time in total.
Charlie,
Thanks, good suggestion. I'd be interested in finding out how far off optimum settings are among those who compare torque settings. Is there a significant variance among the different CAL 36/4 tools out there.
I'm not an engineer so I'm not sure what a +/-6% variance equates to for something like 0.4Nm torque measurement assuming the torque tool is still in spec. I assume it would be a range of .376 to .424Nm. Is that greater than the fine adjustments being made to the torque wrench?
Not sure it is because minimum graduation appears to be 0.2Nm according to the spec sheet.
http://www.srtorque.com/Products/System ... CAL36.html
I don't think my idea will work after all, unless you have more exact figures, so ones that include the number of 'plus' or 'minus' notches. This refers to the top of the driver where there is a series of holes. One notch means moving it one hole tighter or looser.John wrote:I'd be interested in finding out how far off optimum settings are among those who compare torque settings. Is there a significant variance among the different CAL 36/4 tools out there.
My driver is 1 notch out, sometimes 2, so requires a fraction more tightness. For example, if Fredrik were to prefer the Klyde at 0.4Nm minus one notch, then I had to use 0.4Nm plus one notch. Whereas I felt my arm height was only 1 notch out. I seem to recall being told the SV drivers are less acurate at very low torque.
It might seem a bit 'secret squirrel', but to be fair to Thomas, in particular, he's invested a lot of time and effort in this and probably doesn't feel like handing it all over on a plate. Maybe take it offline and send him a PM.
I received the tool today but am still waiting on the required bits to work on the LP12. I do have standard screwdriver bits that fit the tool and did find that less torque was required to loosen a screw than what was used to tighten it.lejonklou wrote:
But when loosening, the torque required isn't always the same as the one you tightened it with. Try it and you will see what I mean.
The tool I purchased is in very nice condition and is very straightforward to use. I'm re-reading a few of the torque threads and they now make a lot more sense. Exciting times ahead!
Hello All,
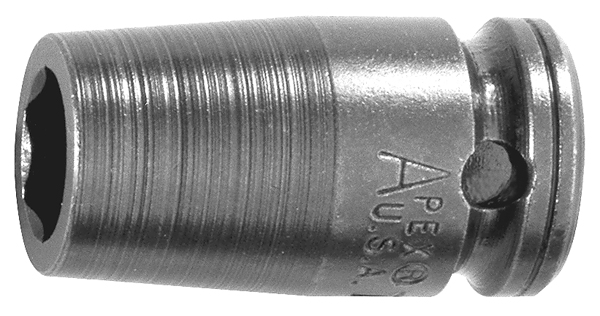
Been away on vacation and returned a few days ago. One highlight was a visit to Overture Audio to see Thomas and find out more about how he uses the torque tool to setup LP12's. Upon my return I had also received my package from MRO tools including the necessary bits to pair up with the SR CAL 36/4. I was thrilled to find out that the 5.5 mm socket was tapered at the end as Thomas pointed out that the one he ordered had to be machined down in order to fit into the tight area around the motor nut.
I also decided the time away was a nice opportunity to have my 21 year old Lingo recapped so picked that up upon my return and put that into the system. I'll follow up a bit later on what was accomplished with Thomas and some of the results I've gotten with my own LP12.
Cheers,
John
Thomas was very generous with his time, I believe I was at the shop for 5 hours or so. I had a very nice visit and was able to listen to tune dems demonstrating changes of one or two notches in either direction to the torque of the Ekos arm height bolt and the effect was pretty apparent when it was dialed in to the optimum setting. This was demonstrated in a top notch Linn system with the LP12 on a Quadraspire wall shelf and then while on a Linn jig hooked up to a modest system. The effect of centering and balancing the platter was also demonstrated while the LP12 was in the jig and again this setup was more than good enough to show the effect on the tune by having these aspects dialed in.
I was quite surprised on how small changes in torque could have such an effect on overall performance. I can't imagine such precision could be accomplished by feel without the aid of a torque screwdriver. Certainly Thomas was onto something quite exciting, I couldn't wait to get home and try this on my own LP12.
I was quite surprised on how small changes in torque could have such an effect on overall performance. I can't imagine such precision could be accomplished by feel without the aid of a torque screwdriver. Certainly Thomas was onto something quite exciting, I couldn't wait to get home and try this on my own LP12.
Back home from vacation last Saturday away from the hi-fi for two weeks. Immediately powered up the amps which were unplugged while away. The Lingo was retrieved Sunday afternoon after being re-capped while away. Plugged it in to make sure it was working and checked the speed to make sure all was well, it was. I let it power up overnight before making any judgement on how it sounded as I always thought the Lingo sounded better after it had a chance to power up and stabilize after being powered down for a period of time.
Did some extensive listening Sunday night and Monday and it was nice to be back home after being away from the system for so many days. The rebuild seemed to help the Lingo as I'm sure the caps were pretty tired after 21 years. It wasn't an obvious improvement but having not listened to the LP12 for so long it was hard to get a real handle on any difference over that amount of time being away. I also felt that the new caps would take several days to form or bed in and would gradually get better over the next week or so. The Lingo certainly didn't sound any worse than it did before. Glad to have done the preemptive service on the Lingo and to have found someone local to do the work. I was anxious to get started with torque experiments but wanted to reaclimate myself with the system before making any more significant changes.
Did some extensive listening Sunday night and Monday and it was nice to be back home after being away from the system for so many days. The rebuild seemed to help the Lingo as I'm sure the caps were pretty tired after 21 years. It wasn't an obvious improvement but having not listened to the LP12 for so long it was hard to get a real handle on any difference over that amount of time being away. I also felt that the new caps would take several days to form or bed in and would gradually get better over the next week or so. The Lingo certainly didn't sound any worse than it did before. Glad to have done the preemptive service on the Lingo and to have found someone local to do the work. I was anxious to get started with torque experiments but wanted to reaclimate myself with the system before making any more significant changes.
OK, enough of this waiting, I was ready to start experimenting late Monday. I thought the first thing to do was to experiment with the arm height adjustment nut. It was the easiest adjustment to make and the deck could remain in the same spot on the rack the entire time. I had previously determined the ideal arm height and found a 3mm Allen wrench came it handy for making sure the gap between the arm collar and Ekos remained the same between removal of the arm and making adjustments.
I first tried the arm at 1.6 and thought things immediately sounded more tuneful. I likely had the torque set higher than that setting as done by hand but there is no way to really tell. I tried 1.6 + 2 notches and thought it was better, I went up to 1.6 + 4 and it got worse. I went either side of 1.6 +2 by one notch and felt 1.6 +1 was best. This made me feel good as this was the number Thomas felt was best with his tool.
I first tried the arm at 1.6 and thought things immediately sounded more tuneful. I likely had the torque set higher than that setting as done by hand but there is no way to really tell. I tried 1.6 + 2 notches and thought it was better, I went up to 1.6 + 4 and it got worse. I went either side of 1.6 +2 by one notch and felt 1.6 +1 was best. This made me feel good as this was the number Thomas felt was best with his tool.